Recording with Altirra
I use the following settings to record PAL machines.

Recording with Open Broadcast Studio
I have set the start/stop recording to the hotkey SHIFT+CTRL+F8/F9 and always record the full desktop (2500x1440" on my Thinkpad) in the recording format mkv with the encoding Hardware (QSV, H.264)."
Recording with CamStudio (Obsolete)
This section is no longer relevant. I use Open Broadcast Studio nowadays. The information below is kept just for reference.
Reading software documentation can be challenging, and writing software documentation can be even more complicated. Therefore, I tried recording video tutorials a while ago and found that they are easier to create and consume. The difficult task was finding and configuring the right combination of software for the overall process. Here's what I use and how I use it.
- A regular USB headset with a microphone
- The free screen recording software CamStudio
- The free video processing tool VirtualDub by Avery Lee
- YouTube to upload the result to the masses
Here's a step-by-step description of how to set up the environment.
- Download and install CamStudio 2.7.x (32-bit) from https://sourceforge.net/projects/camstudio/ for recording.
- Download and install the CamStudio Lossless Codec v1.5 (32-bit) from https://sourceforge.net/projects/camstudio for encoding.
- Download and install the x264vfw codec from https://sourceforge.net/projects/x264vfw to process H264/MPEG video files from other sources.
- Set your screen resolution to resolution 1280x720 to ensure HD format.
- Start "Recorder.exe" from the CamStudio installation folder
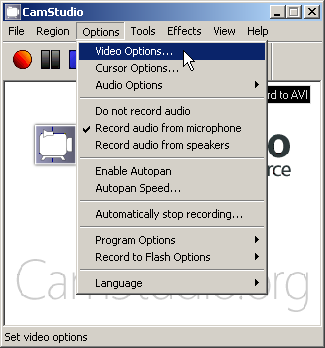
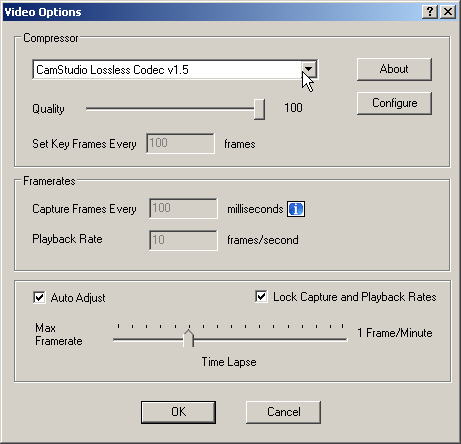
- Select "Options / Video Options... / CamStudio lossless video codec 1.5".
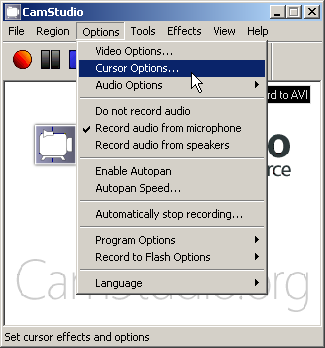
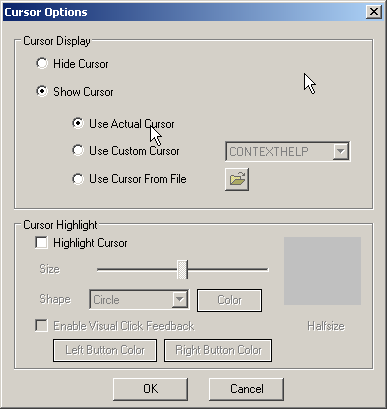
- Select "Options / Cursor Options... / Show Cursor / Use Actual Cursor"
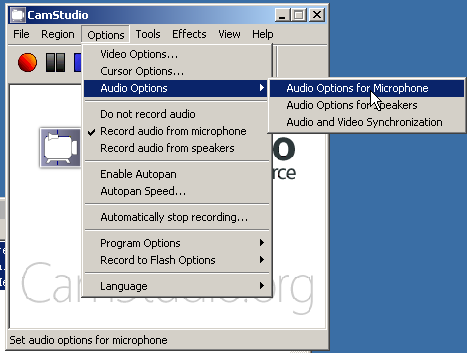
- Select "Options / Audio Options / Audio Options for Microphone / Default Input Device with 44.1kHz, mono, 8-bit".

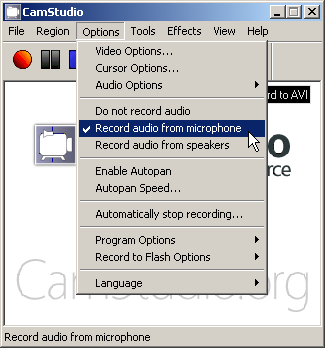
- Select "Options / Record audio from microphone".
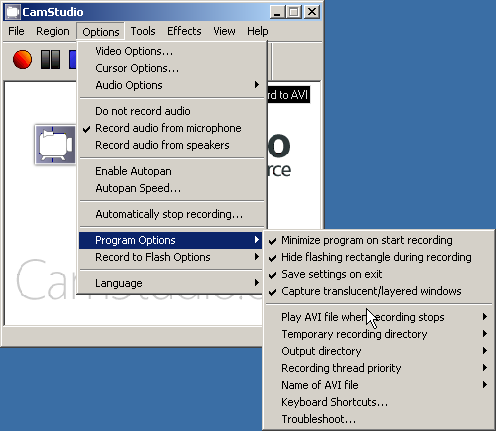
- Select "Options / Program Options / Minimize program on start recording", "Hide flashing rectangle during recording," and "Save settings on exit".
- Select "Options / Program Options / Temporary recording directory / Use Windows temporary directory".

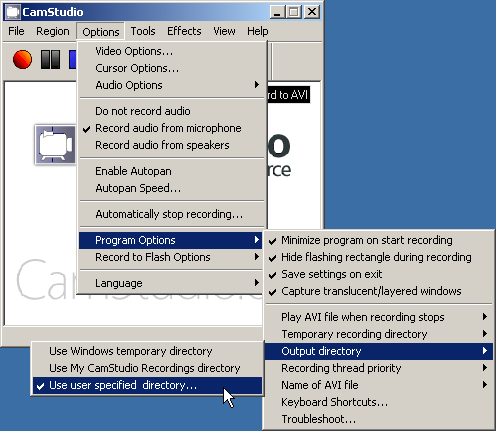
- Select "Options / Program Options / Output Directory / Use user-specified directory" and set the directory you want to use
- Select "Region / Full Screen".
- Close "CamStudio" to save all settings.
- Download and install "VirtualDub" (32-bit) from http://virtualdub.sourceforge.net.
Using the 32-bit versions of the programs and codecs is essential because they won't work together otherwise. This constraint also applies if your operating system is 64-bit. You are now done with the one-time setup steps. Here are the steps to record, edit, and upload.
- Start "Recorder.exe" from the CamStudio installation folder.
- Press the red recording button or "F8" to start recording.
- Press the blue stop button or "F9" to stop recording.
- Enter the name for the new ".avi" file in the file selection dialog.
- Start "VirtualDub.exe" from the VirtualDub installation folder.
- Select "File / Open video file..." to open the unedited".avi" file.
- Use the timeline selection and the "Edit" menu to remove all unwanted parts from the recording.
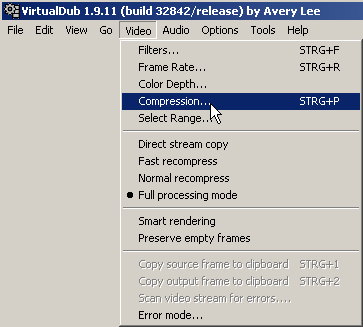
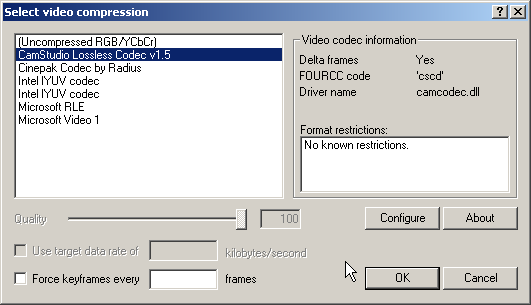
- Select "Video / Compression... / CamStudio lossless video code 1.5" and quality "100%".
- Select "File / Save as AVI..." to save the edited ".avi" file under a new name.
- Upload the edited ".avi" file to your YouTube video manager.